Search
Close this search box.

Adventuring With Friends

Summiting Mount St Helens, An Epic Winter Adventure!

Photo by Alex Schuman

Since moving to the pacific northwest (PNW), a “life goal” of mine has been to gain the skills to climb the 5 active stratovolcanoes of Washington State. My general plan was to knock out the two non-technical mountains (Mt. St Helens, Mt. Adams) to see if the summit life was for me before biting off the big ones (Mt Baker, Glacier Peak, Mt Rainier). I had hiked and failed to summit Mt Adams last summer so the project had been put on the backburner until my close friend and training partner planted the seed to climb Mt St Helens this winter. We had gotten into backcountry ski touring, building up stamina and skills for longer climbs and reasoned that we could use Helens as a type of proving grounds for the work we had been putting in. We set a tentative date for the spring (end of March/early April 2022) pending weather windows/avalanche danger and began making our plans.

Standing at 8,330 ft, Mt St Helens is one of the 5 active dacite stratovolcanoes located in the state of Washington. Formed around 270,000 years ago, it has gained most of its notoriety from its infamous 1980 eruption, launching the top conical 1300 ft. of the mountain into a large debris avalanche taking the lives of 57 people in the surrounding area. That eruption left behind the current 2 X 3.5 km horseshoe crater which is accessible to intrepid adventurers year-round.

There are two main climbing/hiking routes to reach the crater rim of Helens. The summer route (Monitor Ridge) and the winter route (Worm Flow). The summer route is accessible once the snow pack clears out at the trailhead and requires a climbing permit when traveling above the treeline. These permits are accessible online on a first come first serve basis ($15 per climber) the first day of the preceding month. In order to reduce environmental hazard and wear and tear to the mountain, 110 permits are released per day from May 15-October 31. There is no permit cap from November 1st– March 31st, and from April 1st– May 15th there are 350 permits released per day.

The winter climbing route is around two miles longer (12 miles round trip) and is open year-round. The route starts at the Marble Mountain Sno-Park and travels nearly 6 miles to the crater rim gaining close to 5700 ft of elevation largely consolidated to the last 2.5 miles of the climb. This route is the most popular from November clear through to the summer climbing season.

A few notes on preparation for this hike. Accurate weather and avalanche reports are essential to any safe trip. Weather changes fast at elevation and should not be taken lightly. For our trip we relied heavily on the Northwest Weather and Avalanche Center (NWAC) for up-to-date snowpack reports and NOAA for hourly weather reports for our specific region. This provided us with essential insight into the reactiveness of the snow we would encounter along with the relative temperatures/wind we could expect at different elevations. It should be mentioned that all of this information is great for planning but should not be substituted for constant evaluation of the conditions while you are hiking. You or someone in your party should be skilled in reading the snow: looking for wind loaded slab, cornices and reactive snow pack so as to mitigate the relative risk of a slide while traveling. AIARE level 1 and 2 courses are a great way for people to educate themselves on avalanche evaluation and rescue.

At this point it may make sense to go through a general gear list for the trip. It should be noted that this is not an all-encompassing list but this is my general go-to set up for most hikes with the obvious additions for snow conditions.

Gear: 40 L backpack, adjustable hiking poles w/ ski attachment, Leatherman, head lamp, compass, topo map of Helens, med kit, tourniquet, emergency blanket, skis, touring bindings, climbing skins, ski crampons, touring ski boots, ski straps X 3, Ice axe, Ski helmet, ski goggles, sun glasses. (Winter camping gear not included) *

Clothing: ski socks X2, base layer upper/ lower, climbing pants, mid layer nano-puffy jacket, snow bibs (Gortex), Shell ski jacket, rain jacket (Gortex), neck gator, glove liners, down ski gloves.

Nutrition: 2.0 L water bladder, electrolyte mix 2, 16 oz carbohydrate mix, cliff bar X 3, honey stinger goo X 3, PB&J sandwich.

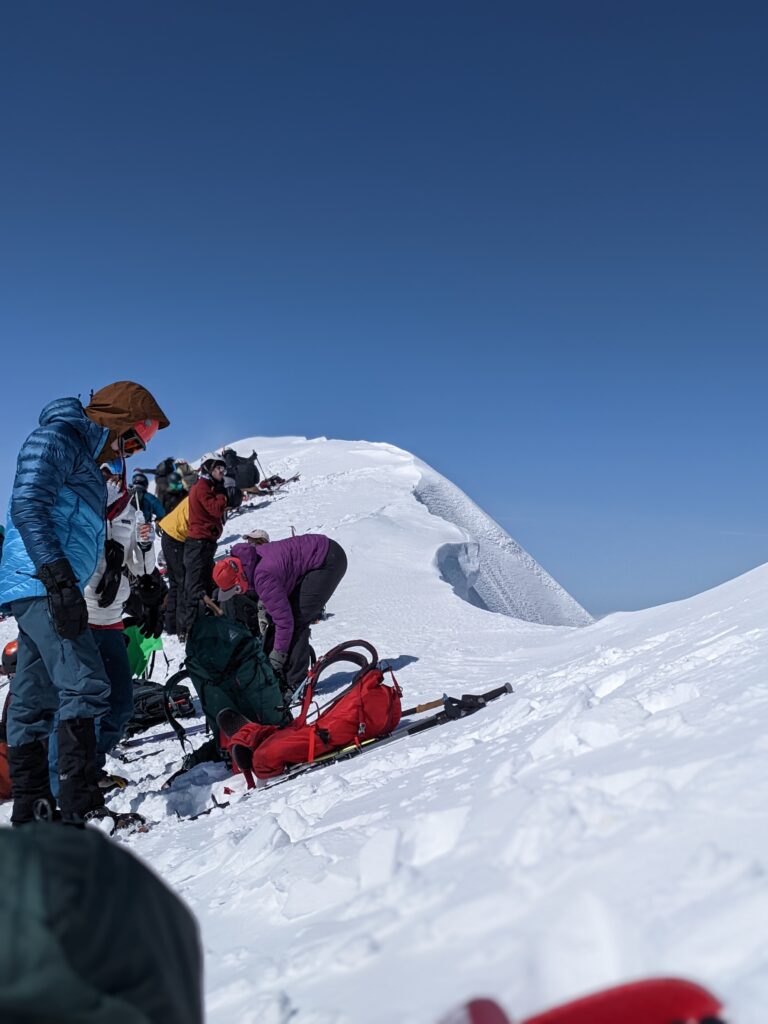
A few notes on gear/clothing/nutrition: In hindsight, I should have had more fluids. It’s something I tend to undershoot when I am hiking so potentially adding an extra liter of water would have been advisable since I was flat out half way on the descent. I also would have felt much more confident during the hike with dedicated ski boot crampons due to the rather lengthy boot pack*(attaching your skis to your pack and hiking up the slope) that ensued (more on that in a bit). Another addition to the gear list should be your avalanche gear: probe, beacon and shovel. Clothing management in the winter is significantly more important due to the higher risk and consequence of exposure related to wet clothing at freezing temps. Everyone’s temperature control is different but gear should include moisture wicking clothing, vents, and if all else fails, changes of clothes to mitigate the risk.

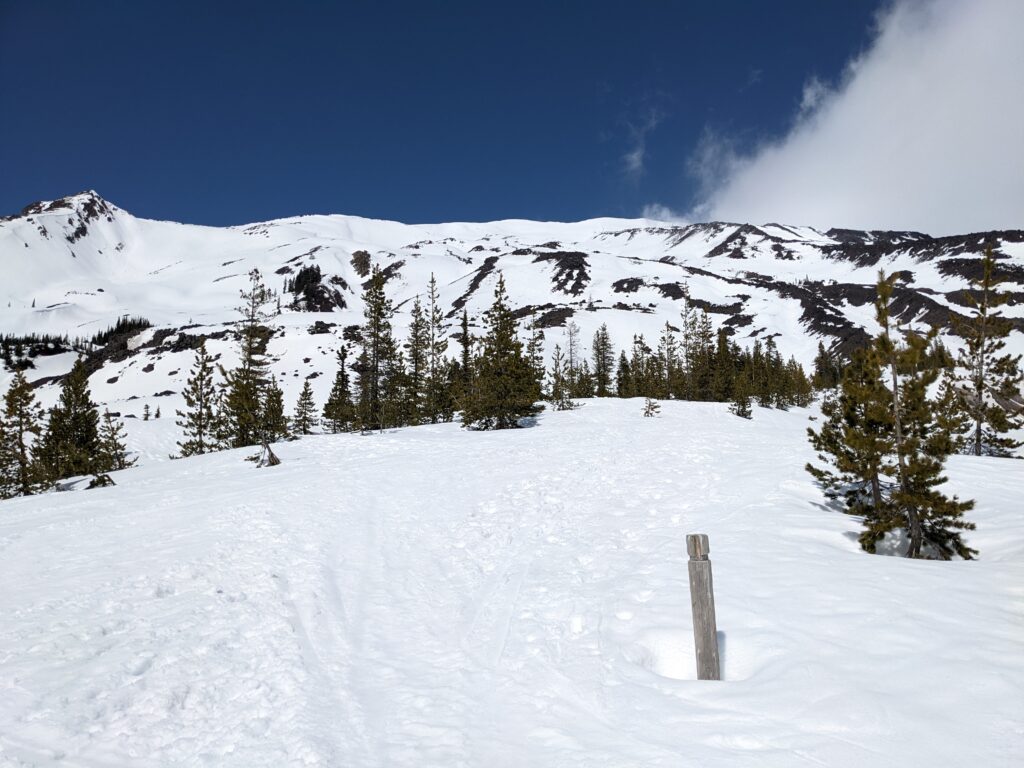
We arrived at the Marble Mountain Sno-Park around 9 pm on Friday March 31st and set up camp in the parking lot near the trailhead. There is a pit toilet and warming hut at the parking lot which is always a little more pleasant than the alternative. The paved lot was largely clear of snow at 2700ft with the trailhead itself completely snow covered from start to finish which was ideal for our ascent on skis. After hunkering down for the evening, we woke up to some freezing rain around midnight which lasted for an hour or two before thankfully receding. Our 4:15 am alarm was a little rougher than usual but like most alpine ascents, an early morning start is essential.  Firmer snow conditions on the way up and optimistically “softer” skiable snow on the way down is always a plus. 

Our three person group assembled at the trailhead at 5:00AM. We signed into the trail ledger and clipped into our skis with our climbing skins to start our ascent. The first two miles leading up to Chocolate Falls were relatively straightforward with a gentle slope and well-marked path. There was a light drizzle that was starting to turn to light snowfall for the first hour or so and I was happy that I had brought my rain jacket. Since April 1st was the first day of the spring season at Helens, there were plenty of people on the trail taking some of the guesswork out of route finding. I generally use the Gaia app on my phone for GPS navigation on hikes but didn’t bother checking it most of the day.

Photo by Alex Schuman
The Crew

The snow was hard packed and iced over due to the rain but overall easy to manage with just our climbing skins. After the falls, things started to get interesting. The snow conditions in the valleys of the lava flows had plenty of soft snow but the ridgeline that intersects the climbing route was pretty wind beaten and iced over making kick turns and traversing the ridge very difficult. This led to my first lesson learned of the day when traveling over ice on skis… If you have the equipment to make your life easier (ie. ski crampons) take the extra 30 seconds to put the damn things on. I ended up sliding out during a kick turn, ejecting a ski 50 feet or so down the slope and very nearly taking out one of my climbing partners. Thankfully I had a shortened ski pole to assist in my self-arrest. All in all, no injuries occurred but it was a jarring experience that definitely gave me a cold dose of caution for the rest of the trip.  

After retrieving my ski and boot packing it back up to the group, I chose to just carry my skis up the rock ridgeline due to the more confident footing. Once we reached the traverse over the ridgeline we had to unclip and carry our skis over and back down the other side of the ridge to the floor of the adjacent flow chute.

Photo by Alex Schuman

Looking up the south side of the mountain we could see a line of climbers heading to the false summit (seismic station at 6200 ft). Unfortunately, we noticed the vast number of the climbers had stashed their skis and had donned crampons for the hike up. Most of the trail reports and beta from recent climbs of the mountain had noted that you could keep your skis on for the entire climb with the exception of directly below the rim. After a quick conversation with the group we decided the snow was just a little too hard for us to keep the skis on comfortably so we followed suit. 

This is where the grind gets real. Since we had neglected to purchase boot crampons and the snow was a bit icy, we were kicking steps into the snow with the toes of our ski boots. Thankfully there was a line of people in front of us that had laid out some steps already.  The rain/snow mix had stopped and the clouds were opening up to clear blue skis. The only real weather we had to contend with was a stiff cross wind that occasionally pushed towards 30MPH. It never really felt too sketchy while hiking but I knew the wind was going to be spicy for the ski down.

Photo by Alex Schuman

Once we reached the weather station, we took a short break to get some food in before the final push to the crater rim. I highly recommend that you pack in the calories at this point and get some water. The last mile to the rim is no joke and a straight shot up. This is where the wind really made its presence known but at least you can now see the rim giving you a clear objective.

By the time I got to the rim, the wind had miraculously stopped and we had clear 360 panoramic views above the clouds/marine layer. We could see the tops of Mt. Rainer, Mt Adams and even Mt Hood off in the distance. The views at the top of these volcanoes are truly unique and worth the sweat equity to get there.

Photo by Alex Schuman

The crater rim is not very wide so everyone had pretty much lined up along the mountain face side. There is significant cornice danger on the opposite side of the rim leading down to the lava dome and glacier sitting at the center of the crater. I estimated the overlay to be about 10+ feet so we stayed well back from the edge. The true “summit” or highest section of the mountain is about a ¼ mile traverse along the rim edge but with the wind and cornice danger we opted to stay where we were. 

Photo by Alex Schuman

The snow at the top was cold and light making our transition from hiking to skiing very easy. We waited an extra beat to catch our breath and plan out our descent. If you aren’t skiing, you can glissade down the mountain where the pitch is steep enough or walk down. When coming down, it is important to note that you give the right of way to the climbers coming up the track. With plenty of open terrain to navigate and a softened snow pack with the late morning/early afternoon sun, we took off down the mountain.

It seems self-explanatory but if you are not a confident and competent skier in variable snowpack… consider snowshoeing/hiking vs skiing. The slope is definitely manageable for an intermediate level skier but be prepared to transition quickly from ice, to corn, to slush and that quintessential PNW concrete. My legs were cooked from the climb up so I definitely took a more conservative ski line on the way down. Route finding on the way down is sometimes a little trickier due to your speed so take breaks often in order to find your waypoints.  There isn’t a lot of tight tree skiing required during this descent but ski to your comfort level and remember there is no shame in hiking down the gnarly stuff.

The temperature remained cool but the sun was plenty warm on the way down. The wind had almost completely died by the time we had descended to the tree line and Chocolate Falls. The only hazard we had to manage was a particularly narrow and steep section where the snow had turned slushy. I took off the skies and hiked/slid down that section but managed to ski the rest of the way back to the trailhead and parking lot.

We arrived at the trailhead at almost exactly 2:00pm. We traveled near 12 miles with 5500 feet of elevation over an 8 hour period. This was an epic adventure that I will remember for the rest of my life. Hopefully this personal account can provide others with the framework for an epic day on one of Washington State’s iconic volcanic mountains.

Life rips; stay safe out there and don’t forget the celebratory post hike beverage!


Alex 

Other Top Posts!